In the realm of construction and civil engineering, sheet pile installation is a critical technique used for a variety of purposes such as retaining walls, cofferdams, and deep foundations. Mastering this process can be a game-changer, ensuring the success of your project. In this comprehensive guide, we will walk you through every step of sheet pile installation, sharing expert insights and best practices to help you achieve flawless results.
Understanding Sheet Piles
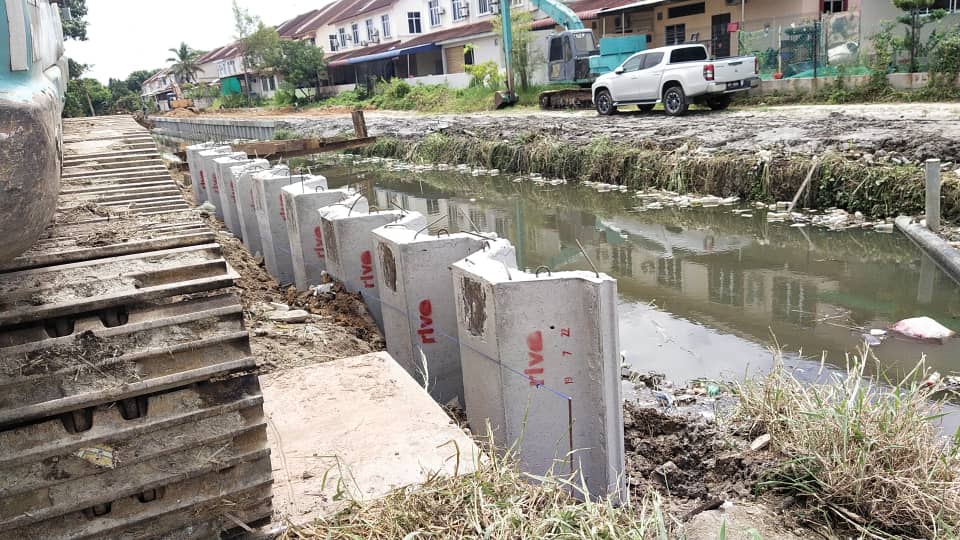
Before delving into the installation process, let’s grasp the fundamentals of sheet piles. These are long, interlocking steel sections or vinyl sheets that are driven into the ground to create a sturdy barrier. Sheet piles are primarily used in scenarios where soil or water needs to be retained, and they come in various shapes and sizes to suit different project requirements.
Selecting the Right Sheet Pile Material
Sheet piles can be made from a variety of materials, including steel, vinyl, and concrete. The choice of material depends on factors such as the project’s environmental conditions, load-bearing capacity, and longevity. Steel sheet piles are a popular choice due to their strength and durability, making them suitable for both temporary and permanent structures.
Preparing for Installation
Site Assessment and Planning
A successful sheet pile installation begins with a thorough site assessment. You must understand the soil conditions, groundwater levels, and any potential obstacles beneath the surface. This information will help you determine the appropriate sheet pile design and installation method.
Equipment and Tools
Gathering the necessary equipment and tools is crucial for a smooth installation process. Some of the essential items include:
- Pile driver or vibratory hammer
- Excavator or backhoe
- Safety gear for workers
- Surveying equipment
Sheet Pile Installation Steps
Step 1: Marking the Layout
Start by marking the layout of your sheet pile wall on the construction site. This involves determining the precise location and alignment of the sheet piles. Accurate measurements and alignment are essential to ensure the wall’s stability.
Step 2: Excavation
Once the layout is marked, excavate the trench where the sheet piles will be installed. The depth of the trench should accommodate the entire length of the sheet pile, plus some additional space for driving and interlocking the piles.
Step 3: Driving the Sheet Piles
With the trench ready, it’s time to drive the sheet piles into the ground. The method of driving depends on the chosen equipment. Vibratory hammers are often used for sheet piles in softer soils, while impact hammers are suitable for dense or rocky ground.
Step 4: Interlocking
As each sheet pile is driven into the ground, they must be interlocked to form a continuous wall. This interlocking mechanism ensures the stability and integrity of the structure. Proper alignment is crucial to achieve this.
Step 5: Checking Alignment
Regularly check the alignment and verticality of the sheet pile wall as you progress. Any deviations from the planned layout should be corrected immediately to avoid issues later in the project.
Step 6: Securing the Top
Once the sheet pile wall reaches the desired depth, secure the top section with a capping beam or other suitable methods. This provides additional stability and load-bearing capacity to the structure.
Sheet Pile Installation Best Practices
To ensure the highest quality sheet pile installation, consider these best practices:
- Conduct thorough soil and site assessments before starting.
- Choose the appropriate sheet pile material for your project’s needs.
- Monitor and control groundwater levels during installation.
- Maintain proper alignment and verticality throughout the process.
- Inspect the interlocking of sheet piles for tight connections.
- Regularly check for any signs of deformation or misalignment.
Conclusion
Sheet pile installation is a complex but crucial aspect of many construction projects. By following these steps and best practices, you can achieve a successful installation that provides the stability and reliability your project demands. Remember that each project may have unique challenges, so consulting with experienced professionals is always a wise choice.